Resi has recently announced two new major feature additions designed to help churches take their livestreaming and online ministry strategy to the next level — Resi On Demand and Media Sites. Both of these innovative features were built with one thing in mind: Encouraging deeper engagement and strengthening community between a church and their congregation.
In this short blog post, we’ll explain Resi On Demand and Media Sites, as well as how to set up a Resi Media Site in less than 5 minutes.
Best Livestreaming Equipment
Discover what top-rated equipment we recommend adding to your church streaming toolkit.
Download for free!
Before You Begin
Before we get started, let’s cover the basics — namely, what is Resi On Demand? And what are Media Sites?
What is Resi On Demand?
A revamp of Content Library, Resi On Demand is a full-service on-demand platform that lets you instantly store, display, and share your church’s video content to a user-friendly interface that lets your people access it anytime, anywhere.
To learn more about Resi On Demand, click here.
What are Resi Media Sites?
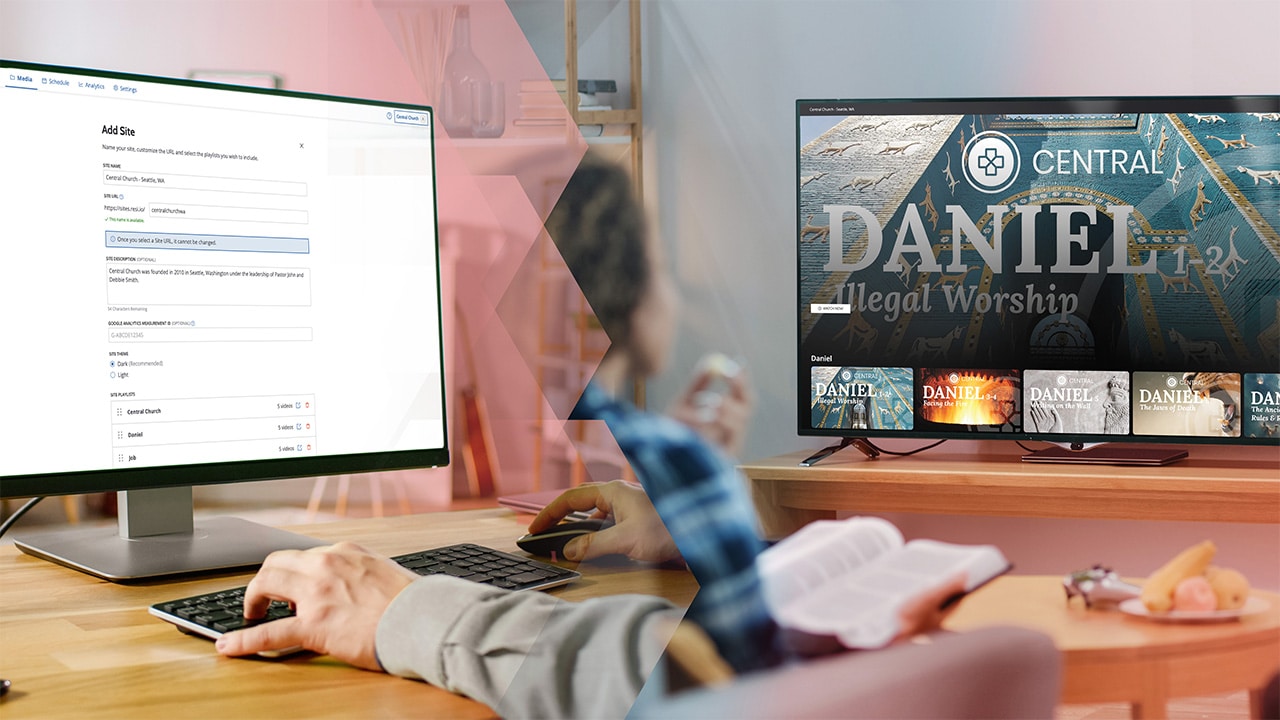
Media Sites is a brand-new feature that gives your church a personalized site from which to host and share your streamed sermons and other video content. Think of it like your church’s own digital TV channel available to your congregation 24/7.
Some of the benefits of Media Sites include:
- From custom playlists, thumbnails, and branding, your site can look, feel, and sound like your church
- No more worrying about disruptive ads, inappropriate “suggested videos,” angry trolls, or Big Tech censorship — you’re in control of what goes on your Site
- Via Resi On Demand, your streamed sermons can be saved and uploaded to your Site and playlist of your choice as it’s being broadcast — saving your tech team hours every week — and making it instantly sharable.
Media Sites are available to current Resi On Demand Pro and Enterprise subscribers. To learn more about Resi Media Sites, click here.
Getting Started
Luckily, for all the benefits provided by a Resi Media, setting one up is incredibly easy. In fact, you can do it in less than five minutes.
However, Before you can use the Sites feature, you need at least one playlist in your Content Library. You will also need an active Resi On Demand Pro or Enterprise plan to use the Sites feature. Contact our customer success team to add the video storage or Sites to your account.
Best Livestreaming Equipment
Discover what top-rated equipment we recommend adding to your church streaming toolkit.
Download for free!
To create your Site, you can watch the video embedded below, or follow the step-by-step instructions written below.
How to Create a Resi Media Site
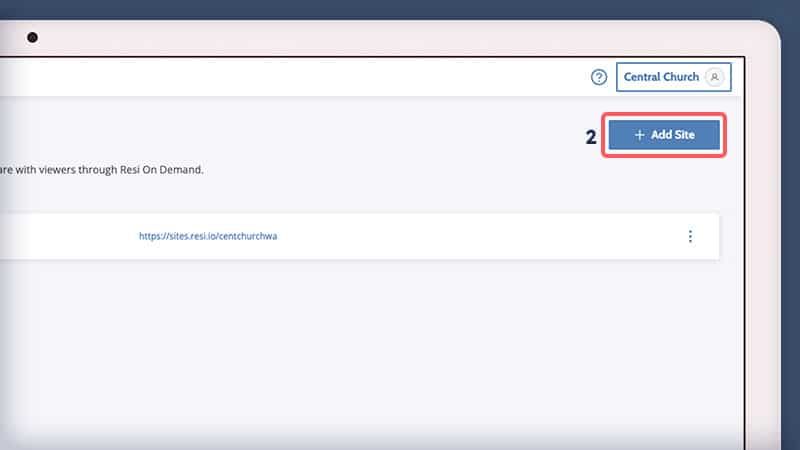
To create a Site, first open up your Resi Studio.
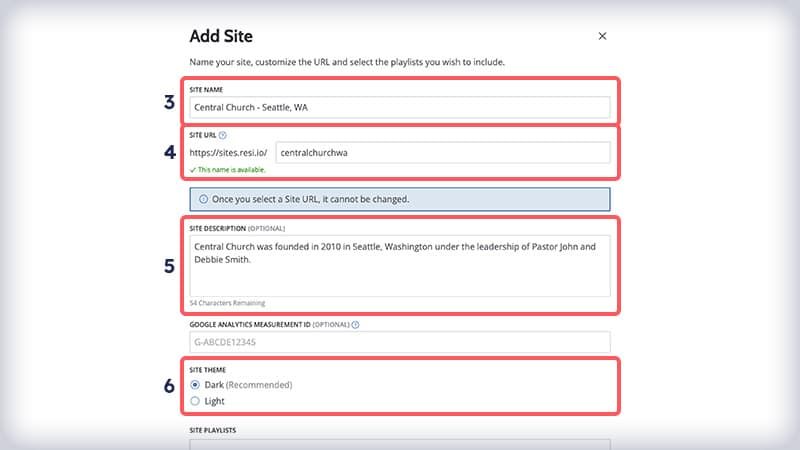
- Select + Add Site
- Give your Site a name. We recommend the name/location of your church, as this name will be used to identify it in your Studio and appear at the top of your published Site
- Enter a Site URL of your choice.
Note: You can’t change this once you save the Site. If you choose a Site URL that’s already active, you’ll be asked to enter a new one.
- [Optional] Enter a description of your Site
- Choose the Light or Dark theme for your Site
How to Add a Playlist in Your Resi Media Site
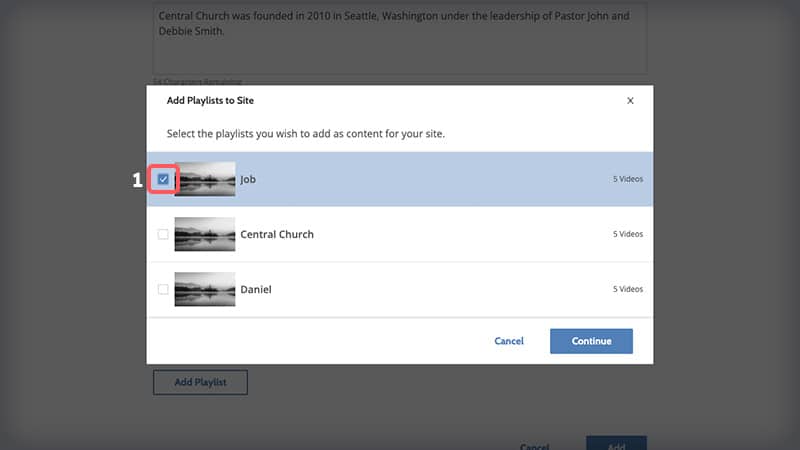
After choosing a Light or Dark theme for your Site, the next thing you’ll want to do is select Add Playlist and follow these steps below.
- In the pop-up modal that appears after you click Add Playlist, check the box on each playlist you’d like to add to your Site, and then select Continue
- Drag-and-drop your playlists into the order you wish them to appear in your Site
Note: The hero banner at the top of your site will be the thumbnail from the first video of the first playlist under Site Playlists.
- Review your Site’s details, and then click Add
And that’s it! Your Site will now appear in your Studio, with the Site name and URL.
Managing Your Resi Media Site
After creating your Site, you may want to make some changes to it.
You can edit, review, or remove your sites from the Sites tab on the Media page. Once there, you can do one or more of the following:
See a “User View” of your Site
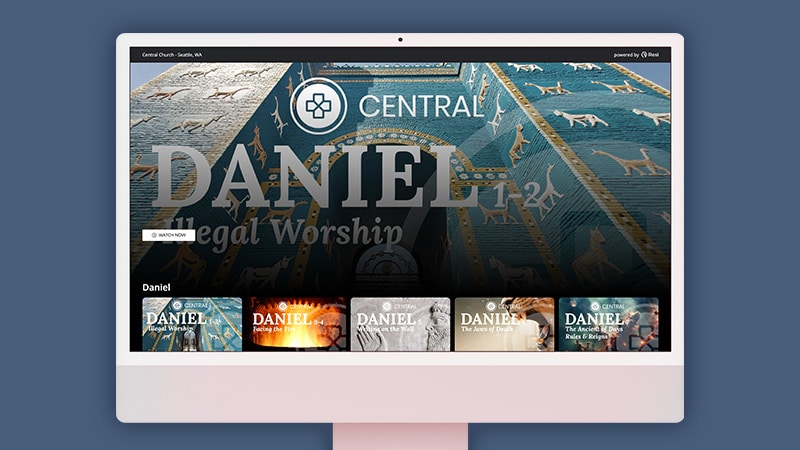
If you click the URL link next to your site’s name, it will open your site in a new tab. This will be what your viewers see.
View or change your Site’s details
- In Studio, click the site’s name.
- Click the edit icon
- You can change anything but the URL.
- Click Save when you are done.
Delete your Site
Click the actions icon and select Remove if you would like to delete your site. You will be asked to type “CONFIRM” before finalizing your changes.
How to Share or Embed Your Resi Media Site
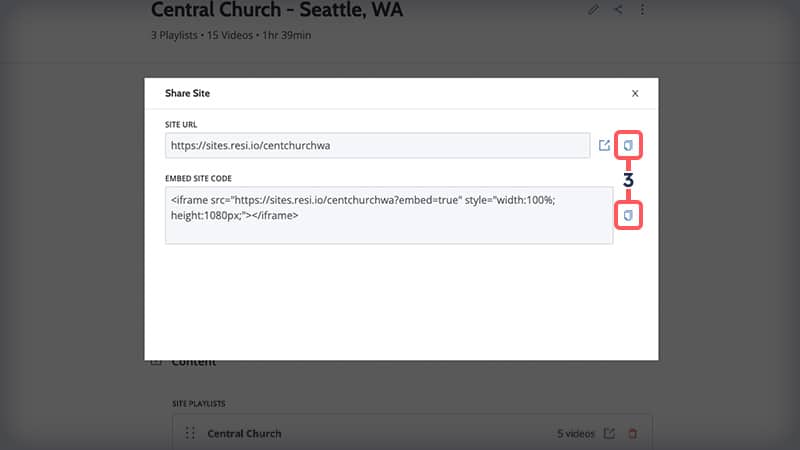
Your Site can also be integrated into your existing website, much like embedding a web player. If you would like to embed your site into a pre-existing webpage, you can do so by using the share modal:
- Click on the name of the site you want to share.
- Click the share icon
.
In the modal that appears, click the copy icon to copy the site URL or embed site code to your clipboard.
Conclusion
Resi On Demand and Media Sites provide an easy-to-create experience that increases discovery, stickiness, and sharing of content—ultimately helping church grow, learn, and strengthen community.
Looking forward, the release of Resi On Demand and Media Sites sets the foundation for deeper integration with Pushpay solutions, including a dynamic mobile app experience which will be announced later this year.
We’re so excited to see how our church partners will use these new features to strengthen community and reach new people!
Get a demo

