Overview
Reimaging your encoder is the process of manually reinstalling Resi’s software on your encoder using a USB drive. If your encoder is not booting up or the software becomes corrupt, this can get it up and running again. All you need to do is create an image installer using at least an 8 GB USB drive. Then, image the encoder from the boot drive.
Note: To complete this process, you need to have a dynamic (not static) internet connection.
Getting Started
First, make sure you know the encoder model you have so you can install the correct software version from the image. There are three ways to find it:
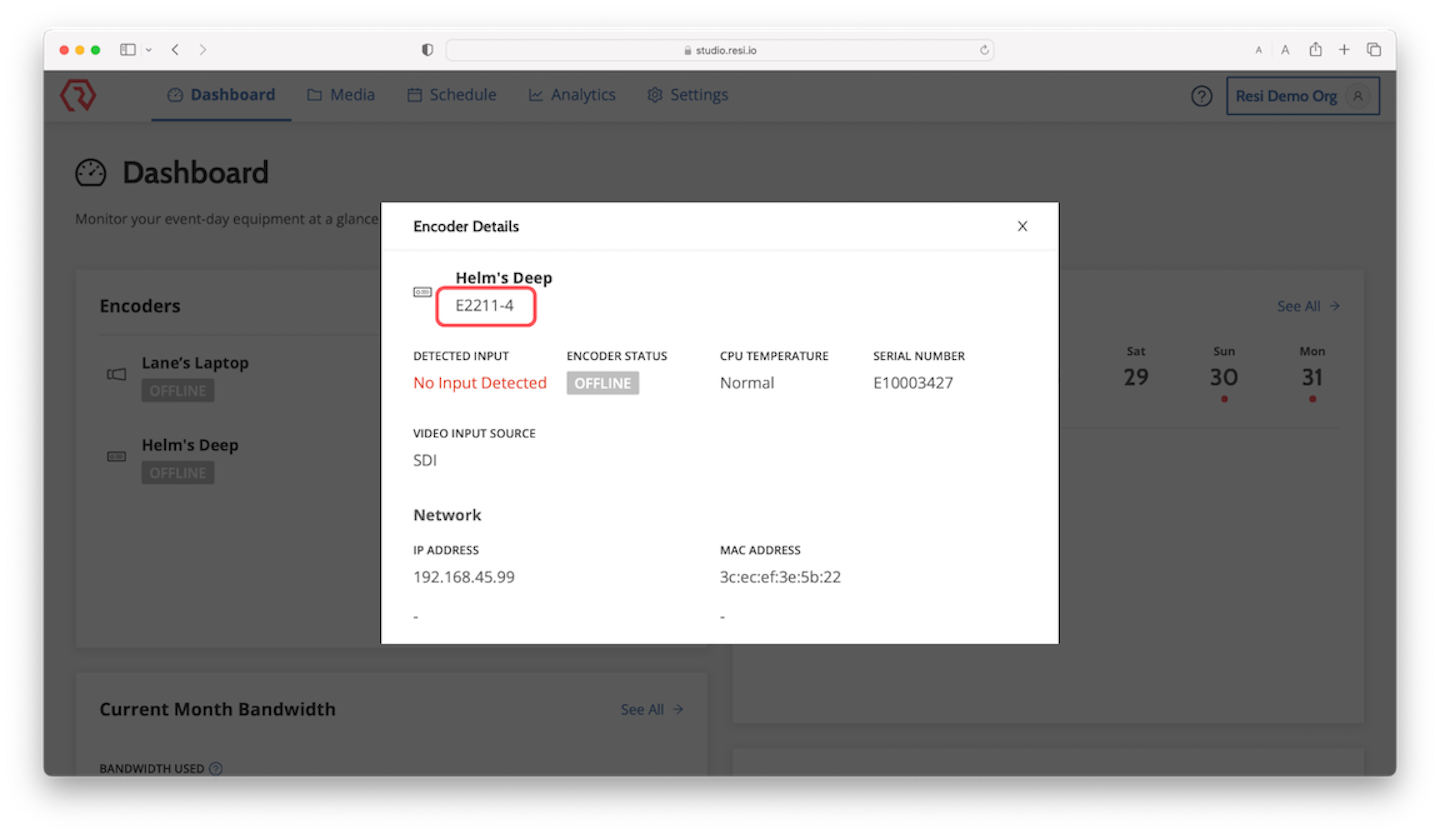
- In Studio, click the Encoder from your Dashboard. The modal may show your encoder model underneath its name.
- Refer to your order information in the original shipping email sent from Resi.
- Call Resi’s support team at (800) 875-0696, option 2. You will need to know your encoder’s serial number. You can find it on the sticker applied to the device under “Encoder S/N#” or in your original shipping email from Resi.
This video walks through the process on a Windows-based machine, but you can prepare the USB drive from a Mac as well.
Prepare the USB Drive
You can prepare the drive using either a Windows-based or Mac-OS system.
Preparing the USB Drive for Windows
- On your Windows-based computer, download the Rufus application (.exe file).
- Download the ISO image (.iso file), which you will use later to install Resi’s software to the encoder.
- Insert at least an 8 GB USB stick or flash drive into your computer.
Warning: This process will permantly delete everything on the USB drive. - Open the Rufus application
- Under Device, select the name of the USB drive you inserted into the computer.
- Under Boot selection, choose the ISO image you downloaded (Resi_INSTALL.iso).
- Under Partition Scheme, select MBR.
- Under Target systems, choose BIOS or UEFI.
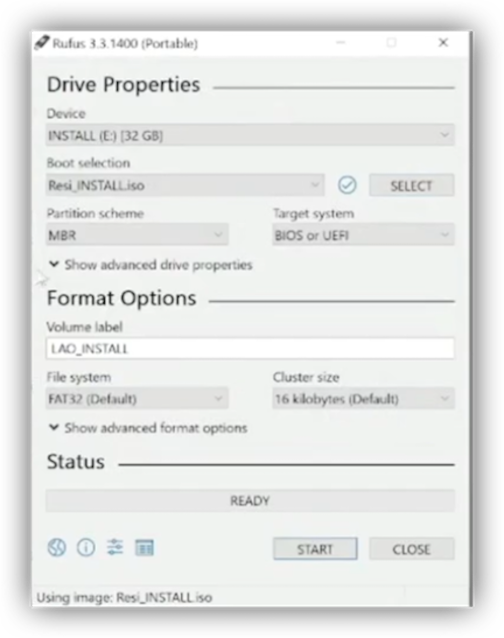
- Click Start.
Rufus will create the image on the USB drive you’ll use to install Resi’s software. Once finished, eject the USB drive from your computer.
Preparing the USB Drive for Mac
Note: You will need an available USB-A port to create a bootable USB drive. As some MacOS-based computers no longer have USB-A ports, you may need an adapter that can provide USB-A connectivity.
- On a MacOS-based computer, download this ISO image.
- Insert at least an 8 GB USB drive. This drive will be formatted.
Warning: All existing data on the drive will be permanently deleted. - Open the Disk Utility application:
- On the left side column, under the ‘External’ drop-down, press (control+click) on the desired USB from Step 2.
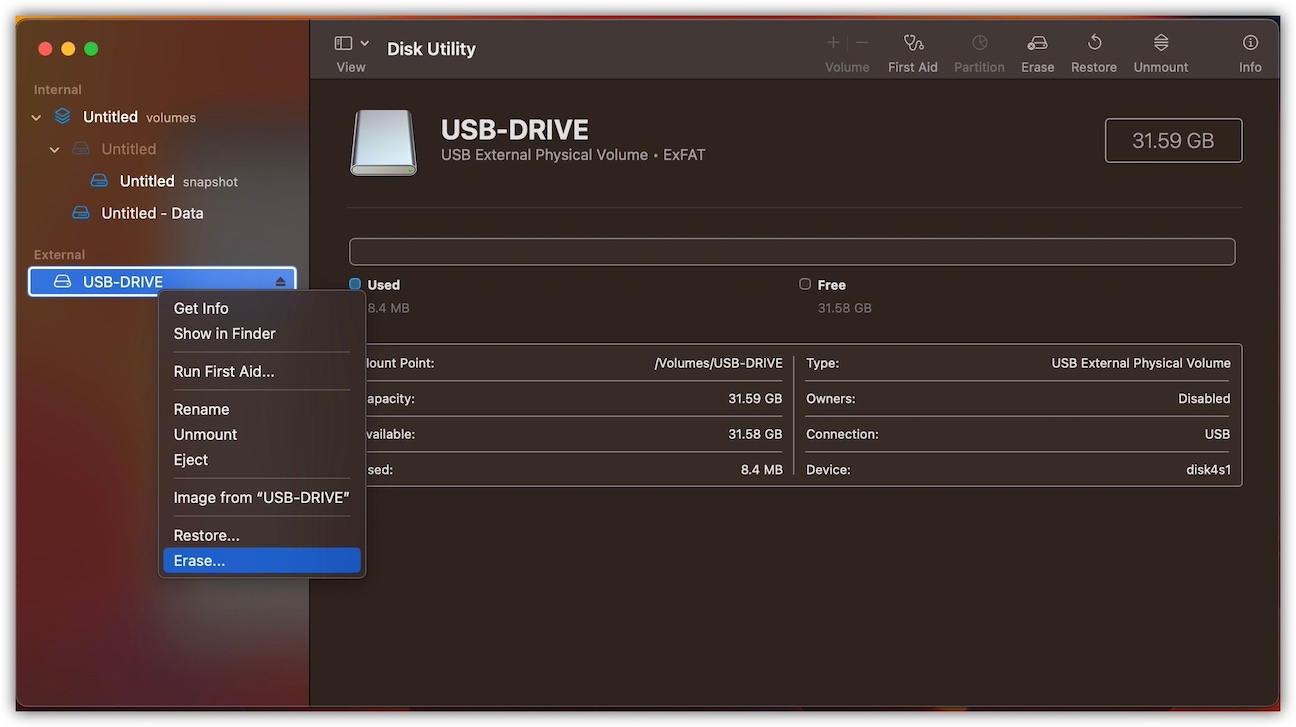
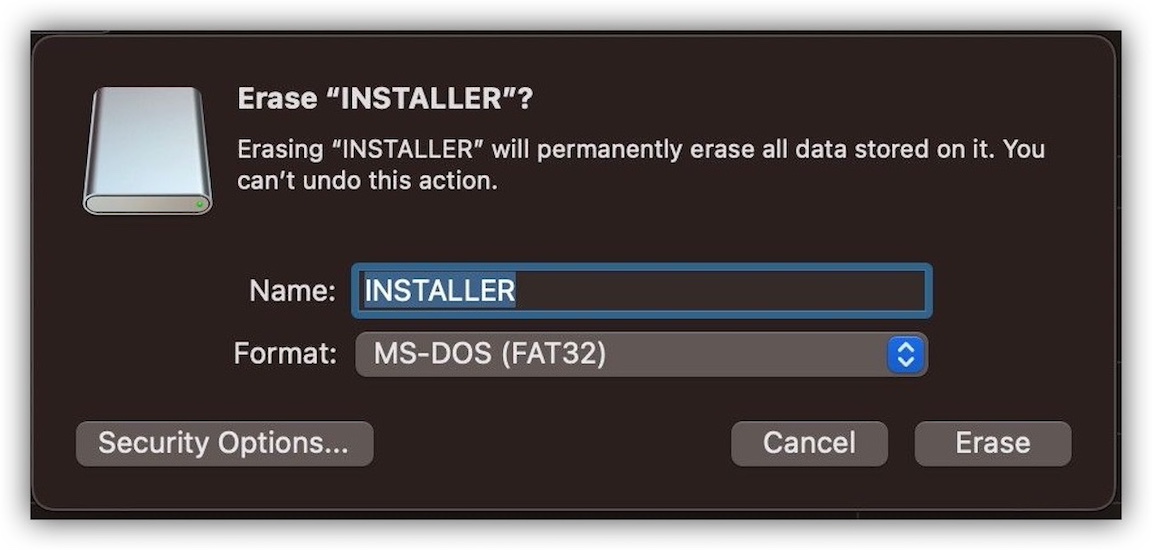
- Click Erase from the pop-up menu.
- Set the Name to “INSTALLER” and the Format to“MS-DOS (FAT32). “INSTALLER” must be in all caps.
- Click Erase and wait until the formatting is completed, then press Done.
- On the left side column, under the ‘External’ drop-down, press (control+click) on the desired USB from Step 2.
- Go into the folder where the compressed image file downloaded in Finder.
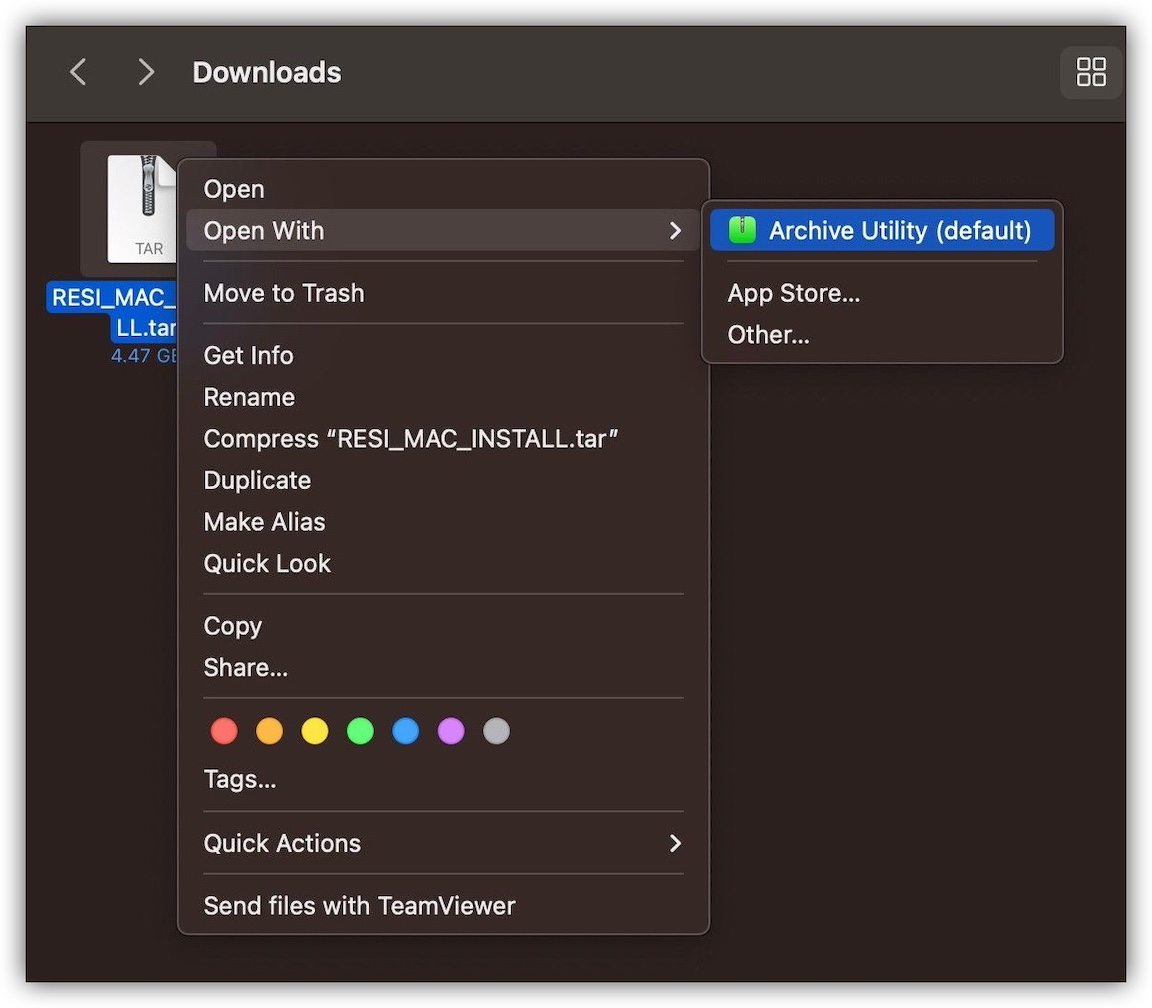
- Press (control+click) on RESI_MAC_INSTALLER.tar.gz.
- Select Open With > Archive Utility.
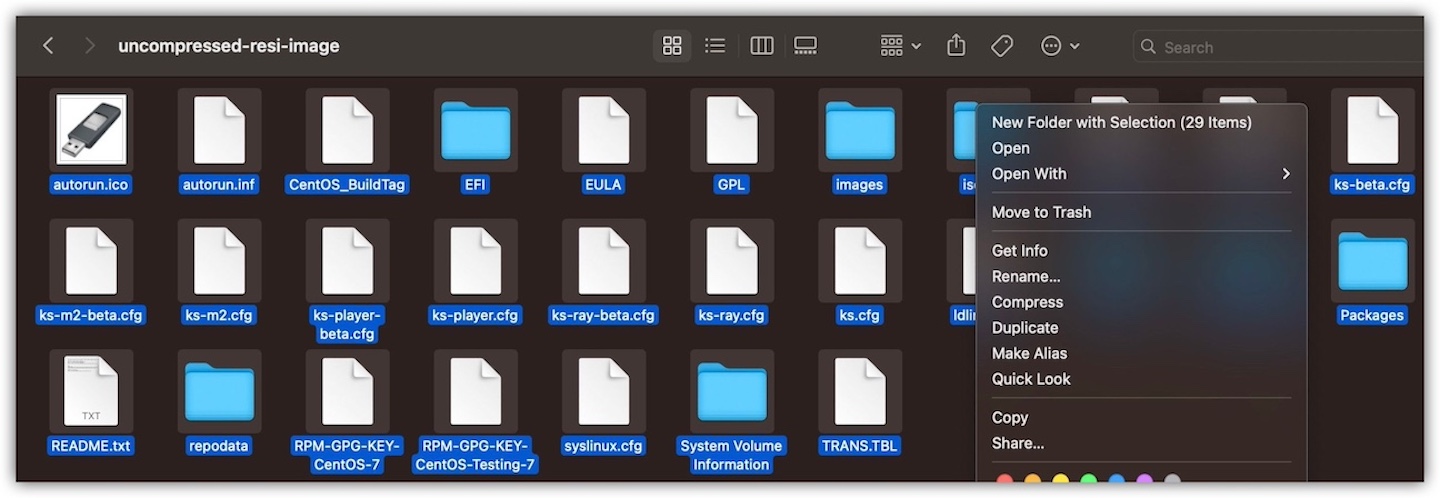
- Wait until the compressed image unzips, then open the uncompressed-resi-image folder.
- Press (command+a) to select all files, then press (control+click) on any of the selected files and select Copy from the pop-up menu.
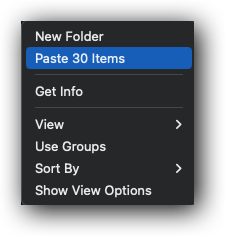
- In Finder, select/open your external drive location named INSTALLER.
- Press (control+click) in the blank space inside the drive and select Paste 30 Items from the pop-up menu.
- Wait until the files have copied completely, then eject the USB.
- Press (control+click) in the blank space inside the drive and select Paste 30 Items from the pop-up menu.
Image the Encoder
Imaging is the process of installing Resi’s software on the encoder using the USB drive you just created. You will need a dynamic internet connection to do so.
Warning: To see if you have a dynamic internet connection, open the Command Prompt, type ipconfig /all, and find the DHCP enabled row. If it displays Yes, you have a dynamic internet connection. If not, you have a static internet connection and will need to find a dynamic one to complete this process.

To find your internet connection type on Mac, navigate to System Settings > Network. Click Network and find the TCP/IP tab. Next to Configure IPv4, you’ll see Using DHCP if you have a dynamic connection.
To image the encoder:
- On the back of the server-grade encoder, remove the display adapter.Note: On older models, the display port is a red adapter connected to the GPU port. On newer models, it’s a small black adapter. On RAY encoders, it is a gray adapter connected to the HDMI port.
- Connect a monitor, keyboard, and mouse to the encoder.Note: Use the mini display port adapter that shipped with your encoder to connect it to the monitor.
- Insert the USB image drive you created into a USB port on the encoder.
- Power on the encoder. Press the F11 key repeatedly (F10 for RAY encoders) until you see a boot option screen.
- Choose UEFI: Partition 1 on the boot screen.
- Select Install Encoder for the model you have. Resi’s software will install on the encoder.Note: RAY encoders, the E4300 and E2221 have specific options. For all others, choose the generic Install Encoder button.
- Power off the encoder, remove the monitor, keyboard, and mouse, and replace the display emulator.
- Power on the encoder.
Your encoder should be all set to begin encoding data again! If you are unable to complete the reimage process, contact Resi’s technical support team.